过保金士顿SA400S37固态硬盘固件通病,不保存盘内数据如何救活?
前言
过保金士顿SA400S37固态硬盘固件通病,不保存盘内数据如何救活?
一、尝试解决
有一块金士顿240G固态掉盘,本想送保金士顿售后,电话咨询要先查是否正品,再是否过保。后经过搜索本系列只保3年,只能放弃。但网上搜索了下感觉还有救就是比较复杂,各个教程试了下总卡在关键点而且相关信息不是很多要么就是收费。
期间也试过软解、SSD MP Tool开卡工具要不识别不到盘,要么就提示错误。
所以刚成功修复完硬盘分享下操作步骤,如需要保资料或在保的硬盘的请无视。
本人硬盘状态是可以读取,格式化后恢复原来盘里的数据,目测已经被锁定进入保护状态了,还有的朋友可能只提示20M的空间大小。
二、修复步骤
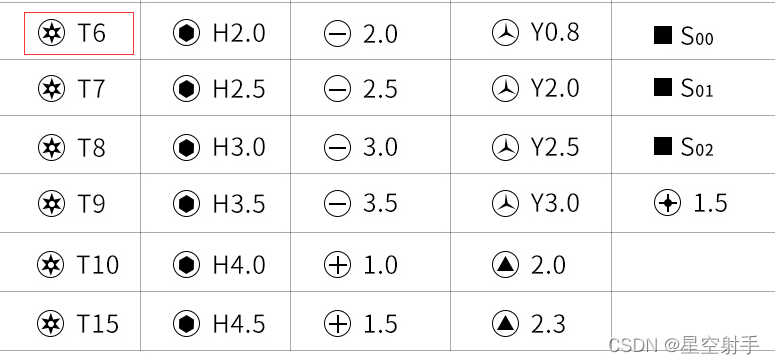
1.购买T6螺丝孔,中间要空心的
打开SSD外壳确认存储颗粒是镁光还是东芝的,打开后确认自己是镁光的颗粒。
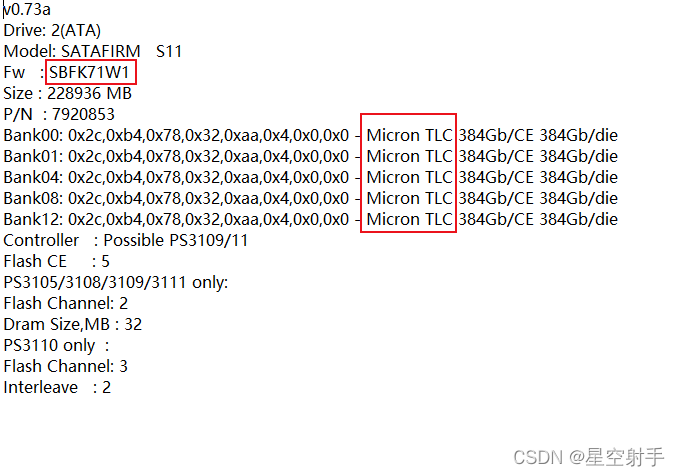
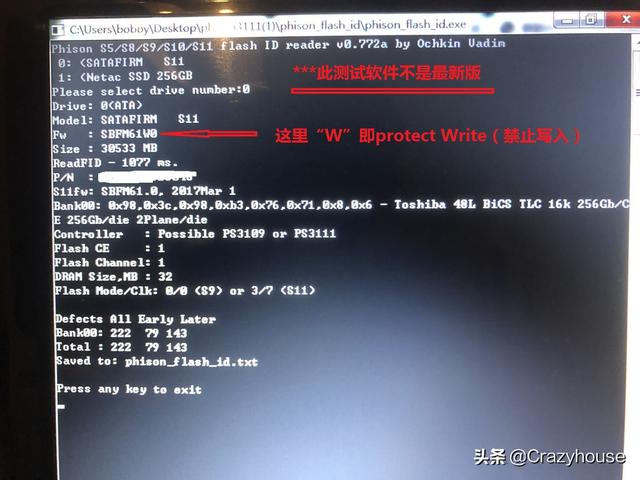
2.用phison_flash_id读取固态型号
例如读取出来Fw : SBFK71W1
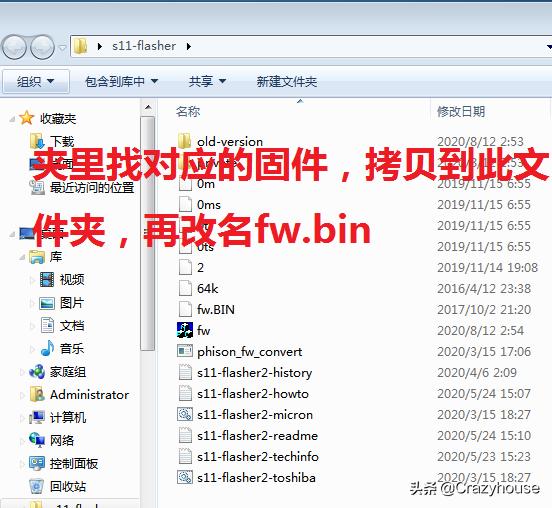
在文件夹里找到71开头的固件版本都拷贝出来
在s11-flasher 里把测试的固件版本改成文件名(fw.bin)放到s11-flasher目录,然后运行s11-flasher-toshiba或Micron,根据自己芯片类型,会生成一个FW.EXE的文件。

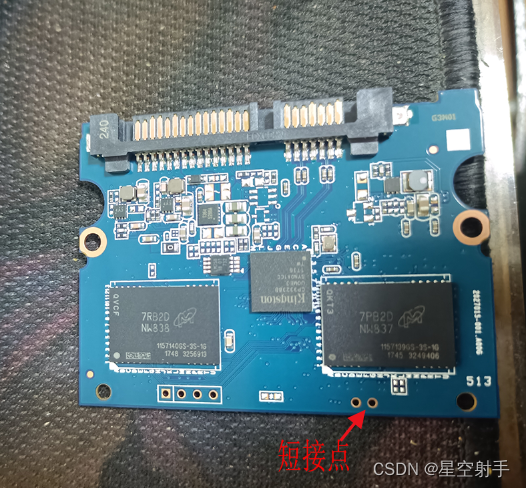
3.固态硬盘短接
这个步骤看了很多教程比较迷茫,短接哪里,需不需要通电,为什么通电了没反应。这里详细解释下,也是很多人这里被劝退的。
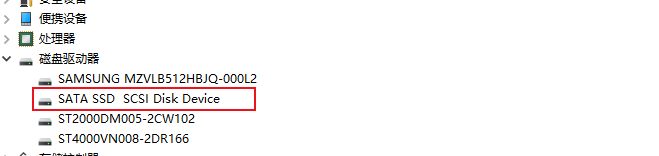
打开固态硬盘,连接到电脑主机SATA接口,用镊子的两头插在主板上只有两个小孔的地方,开机后拿掉镊子。短接前是显示SATAFIRM S11,短接后会显示PS3111,这个时候就OK了,SSD型号可以在电脑-属性-远程设备管理-磁盘驱动器看到。
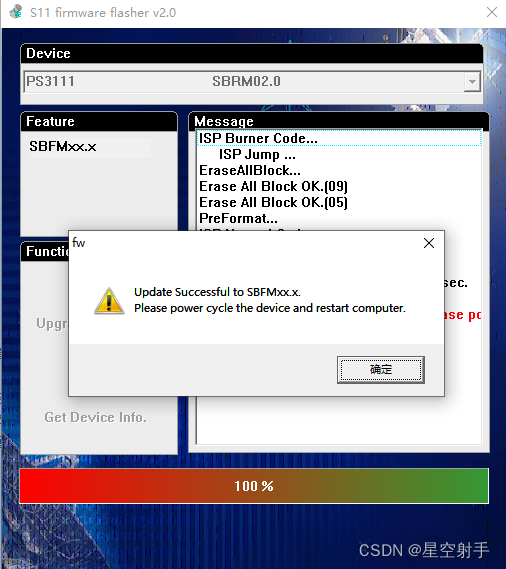
4.用s11flasher写入
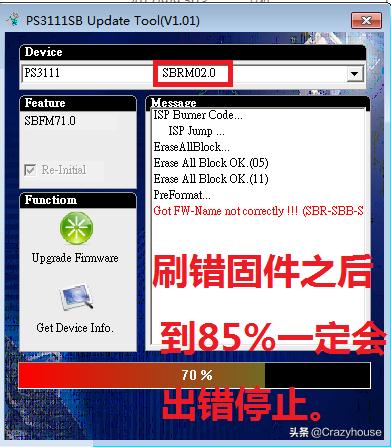
这个时候进入s11flasher的文件夹,用刚才生成的FW.EXE开始写入,如果能顺利到100%则说明驱动是对的,如果在15%卡住不动则需要关闭软件,重新启动重复短接步骤重新刷。
还有种情况是到达100%但是无法显示容量和硬盘,开机还会卡顿,说明驱动的版本不对,重新短接进入系统继续还原,再顺着继续测试,经验是根据购买的日期判断大概的版本进行测试。
5.恢复完成
最后恢复完成会显示硬盘容量,用系统自带的创建并格式化分区工具重新快速格式化就可以用了。
本次用到的软件有:firmware_ps3111、phison_flash_id、s11-flasher
https://download.csdn.net/download/xiechenvip/85052947
总结
例如:以上就是金士顿SA400S37修复过程和方法,相关附件在本人软件分享内下载,要中途碰到什么问题欢迎留言一起探讨,让硬盘继续发挥余热。
在咸鱼淘的32G Msata 固态硬盘。
今天要装Ubuntu才发现无法删除分区,格式化。连DG、傲梅都不能删除分区。
Bing国外站发现固件版本61后面的“w”代表写入加锁。

在https://www.usbdev.ru/ 上找到解决方法。参考以下图片。(软件连接在本文末端)
下面图片里显示主控位phison的PS3111-S11,闪存位东芝颗粒。(这里闪存是东芝?Mt很重要。要看清楚,下面会用到)
baidu上很多什么Unlock之类的教程,对我的ssd都没起到过作用。
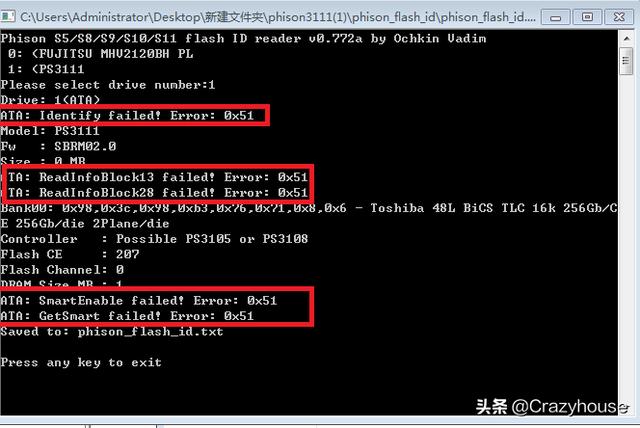
出错 1
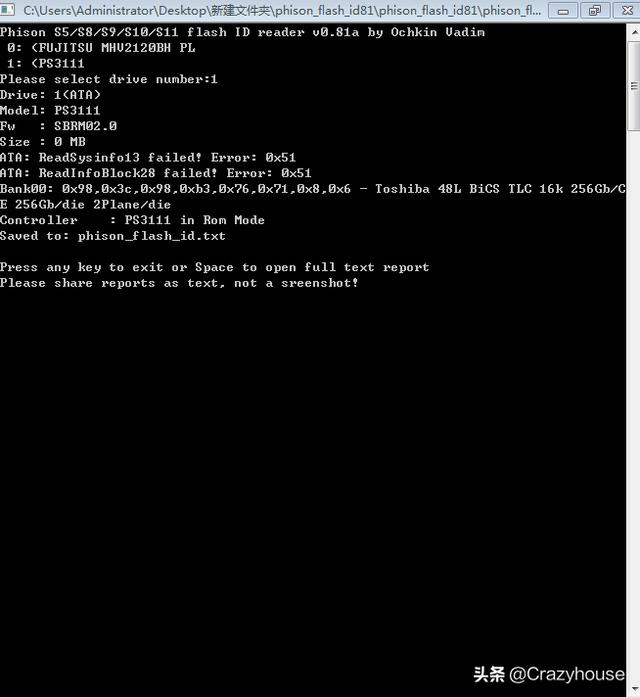
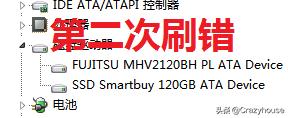
出错 1+
焊出来的两根线是用来短接,进入“刷写模式”用的。一个接地,一个FBC0。
- 电脑进入系统后打开“设备管理器”,
- 短接两根线之后往下按压pcie槽插入就会提示找到“ps3111 SATA SSD”
- 短接的线不要断开。

- 把固件文件夹里对应的文件拷贝到s11-flasher 文件夹。
- 把SBFMxx.x_xxxxxxxx.BIN文件改名成fw.bin
- 上面识别ID软件若识别出东芝闪存的话,运行s11-flasher2-toshiba.bat(会一闪而过)
- 运行自动生成的fw.exe软件
- 在Device下选框里选择要刷写的SSD
- 点击“Upgrade Firmware”刷写固件。
(过程有点慢,慢慢等到100%后出来重启电脑的提示为止)

重启电脑后能正常识别Msata SSD,但是设备名称会跟以前不一样。
(在设备驱动inf文件里可以修改)
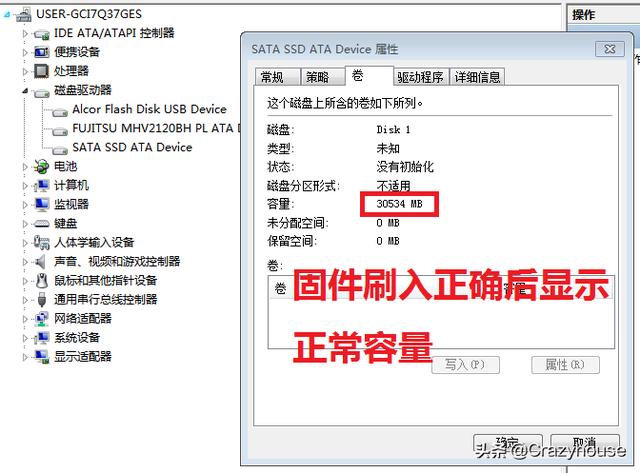
进入磁盘管理后按照下面提示勾选磁盘,再【确定】。
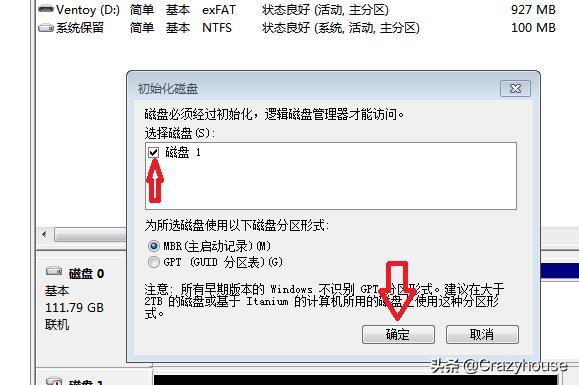
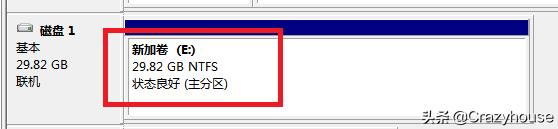
初始化、格式化之后的硬盘能正常识别容量。
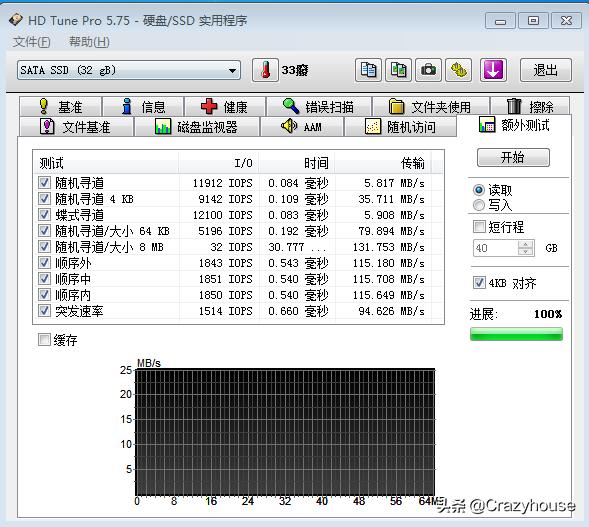
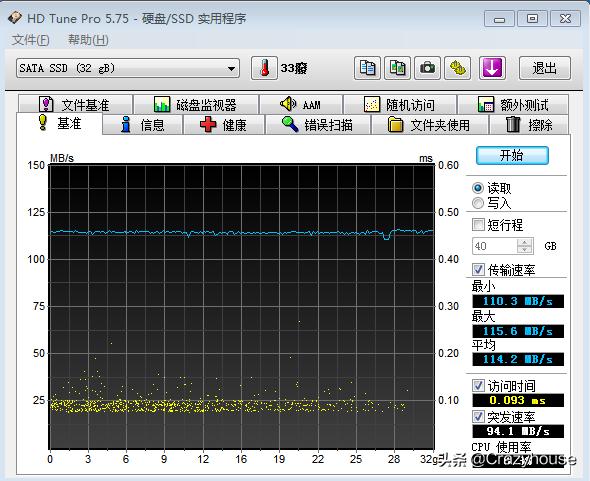
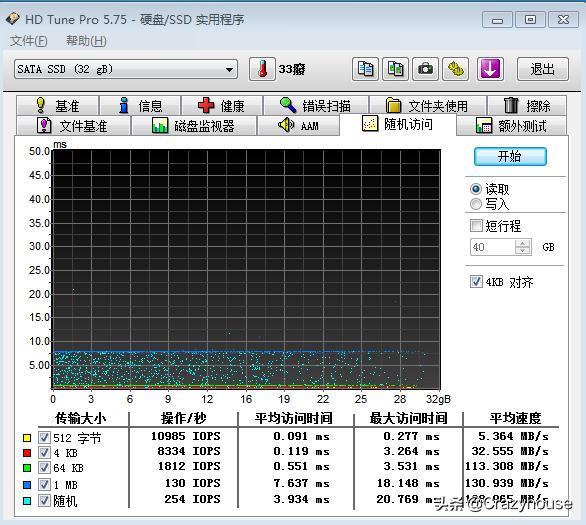
下面是AS SSD跑分(虽然没我用了12年的ocz 60G给力,但是装Ubuntu用是够了。)

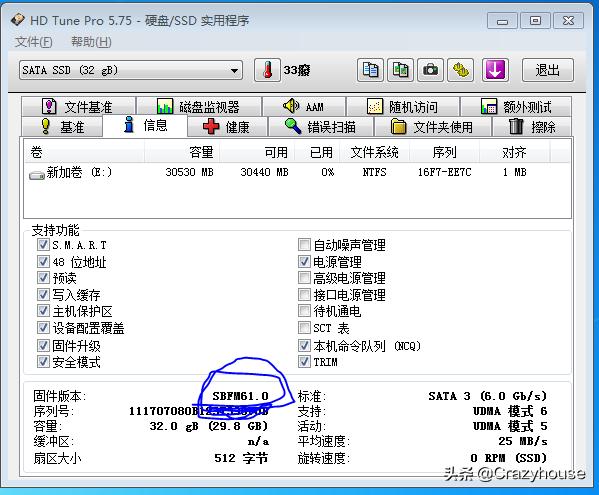
这里固件版本没有了字母“W”
固件
固件链接:https://mega.nz/folder/jxc0xIKJ#tfLzQCD1JHeMgOhvWEyyow
查询是东芝的还是Mt的闪存软件
FlashID查询软件:https://mega.nz/folder/nsEgRQ4R#PmMAWlJD624TqIMk_Bkt9g
固件烧录软件
Flash 软件:https://mega.nz/folder/zkFUBQYK#xQvBmLPkKyct87b4atBgnw
@toyotavan I am not sure if this is a solution to your specific error with the repair utility, and let me tell you upfront that I got a new replacement unit free of charge by Kingston's RMA Team without even needing to ship my defective unit.
That being said, after 3 months somebody on a Brazilian Forum has found a working solution for this problem. [source]
I also took this SATAFIRM S11 BO with Kingston SA400S37. I had that in two at once, one 120gb and another 240gb. In both I tried to use the programs that are available on the sites mentioned by members above, I tried all the way ... It didn't work ... I managed to solve it as follows ...
Note: It is recommended to do the procedure on windows installed in AHCI mode! You MUST perform the procedure with the SSD plugged into a SATA connection, in USB mode it will not work!
1 - Download these two files, one of the files has all the firmware available on the usbdev website, the other file is a program to generate the executable that will make the update:
* s11-flasher - http://vlo.name:3000/tmph/s11-flasher.rar
* firmware_ps3111 - http://http//www.usbdev.ru/?wpfb_dl=6583
2 - Extract the folders.
3 - Inside the "firmware_ps3111" folder, search for the firmware corresponding to your SSD or the closest one you have, copy this file and paste it in the "s11-flasher" folder, then you must rename the firmware to (fw.BIN). [for example if the label on the SSD reads "SBFK71B1", then the firmware that you must pick is "SBFK71F1"]
4 - Run "s11-flasher2-micron.cmd" WIHTOUT administrator privileges: it will generate the executable fw.exe.
5 - You can connect the SSD directly inside the Laptop, perhaps through the CD bay or another SATA free interface. It is not recommended to try Hirens Boot but you can try; remember that AHCI must be enabled in the BIOS. It is also strongly not recommended to use SATA to USB adaptors because the procedure may fail: use a SATA interface.
6 - Run the file fw.exe (this one WITH administrator privileges) and it will write the firmware on the SSD, so you have to select the device that is marked as SATAFIRM S11, click on Upgrade Firmware and wait ... It is recommended before doing this step that all applications are closed and the Antivirus is turned off.
7 - When finished, you must perform a power cycle of the SSD ("disconnect SATA power cable only, not data"), wait 5 seconds and turn it on again (this with the PC turned on), after turning on the SSD, restart the computer to recognize the SSD.
8 - Go to Disk Management, probably opening this part of Computer Management will already ask you to inizialize the disk, click to inizialize it and after that, create the partition in the desired format.
If you need help I did a video trying to explain too:
https://www.youtube.com/watch?v=bgy6VNC9fcw
[固态] 固态电池全面分析——必经之路,2020准固态,2025全固态
[SSD] 固态硬盘论文 没有工具箱怎么办?各类主控固态硬盘优化指南
[SSD] 固态硬盘修复 手把手教你救治不认盘的固态