Ec2下openvpn建设
以来都是用着linode的vps服务,稳定,尊贵,还具有一个最最重要的特点,那就是贵,最低的配置一个月19.95刀。经历了最近的一段穷人时期,我给自己找了各种的免费的替代方案。将博客迁移到sae,由于国内域名的备份问题,最终放弃了,博客最终是迁移到的octopress上,github的免费主页,很是geek的发送博文的方式,下次可以写个教程。
言归正传,注册ec2需要一个大的前提,你必须得有张双币信用卡。注册教程网上很多,我也稍微提下。
一.新用户的注册
1.首先登陆aws的网站http://aws.amazon.com/ec2/

2.选择I’m a new user. 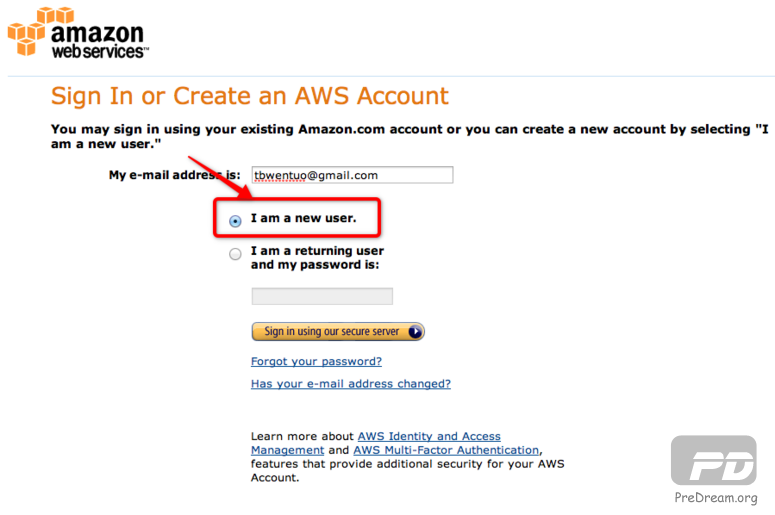
3.点击Sign in using our secure server
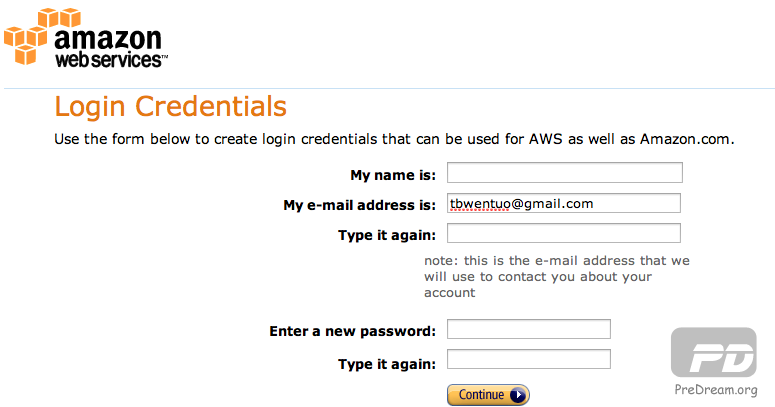
4.填写你自己的name,email,password,点击Continue
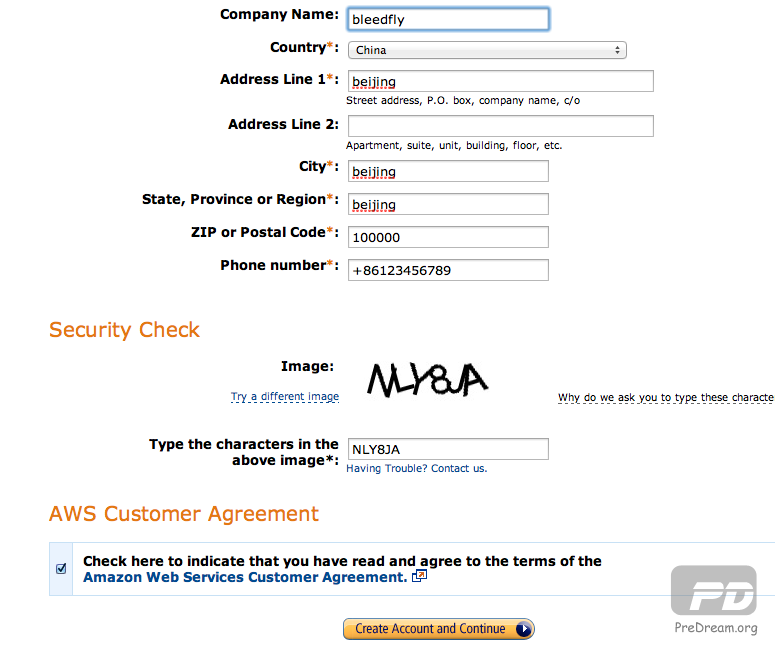
5.填写自己详细的信息,然后Create Account and Continue,直接到一个你需要填写信用卡信息的页面

6.填写完后进入一个验证页面
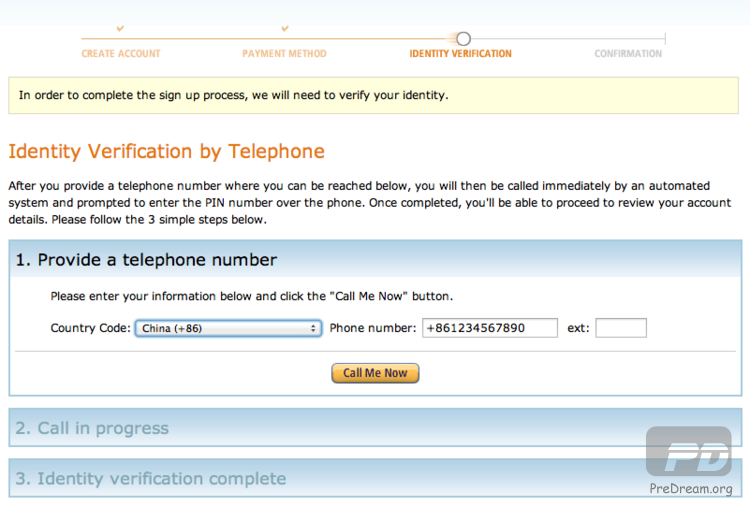
填写完自己的手机号后,亚马逊会打表电话给你让你把页面上的数字输入到手机上,用来确认是人工在操作,验证通过后进入下面页面
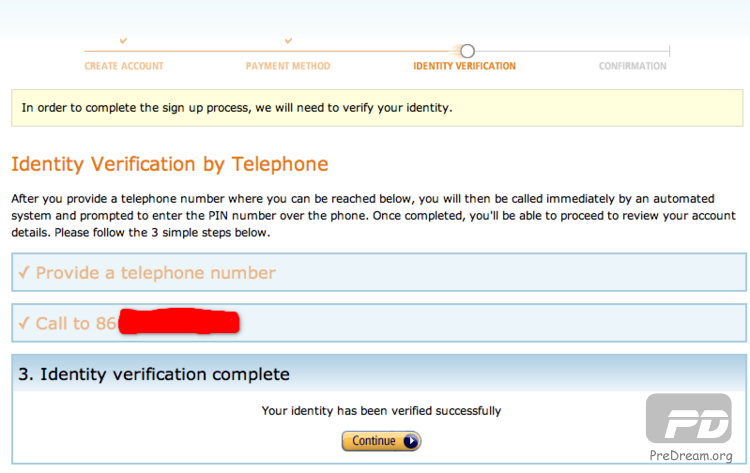
点击Continue进入下一步
7.最后会告诉你,进入审核,然后就等着收邮件吧。
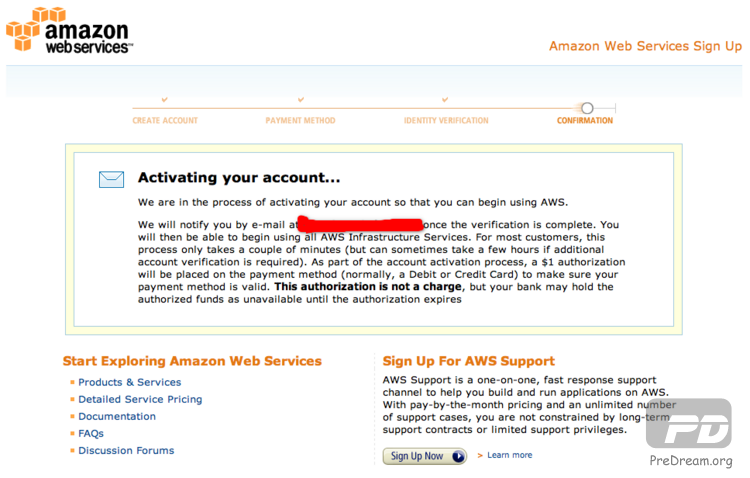
可能会扣掉你信用卡里面1美元做验证,然后会打回去的,请放心,依旧是免费的。
到这整个注册流程就结束了,等待验证邮件发送之后,就能进入自己的ec2了。
二.instance的建立
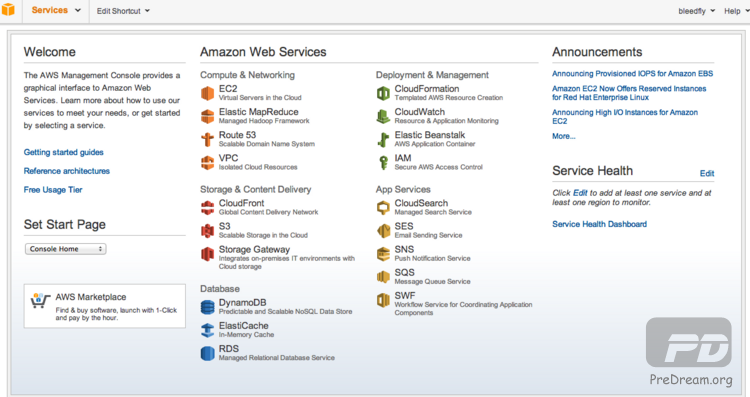
AWS激活之后进入console页面 https://console.aws.amazon.com/console/home
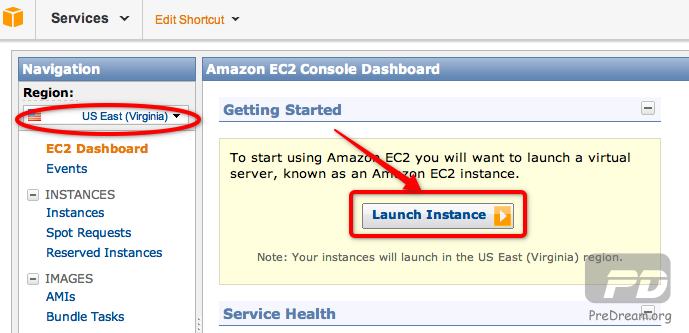
1.选择EC2服务,左边这个可以选择机房所在地,有小日本的机房可选。点击Launch Instance
2.选择 Classic Wizard 点击 Continue 
3.在aim里面记得一定带星号的,是免费政策支持的,这里我选择的是Amazon自己的linux,习惯Ubuntu的可以选择Ubuntu的那个版本
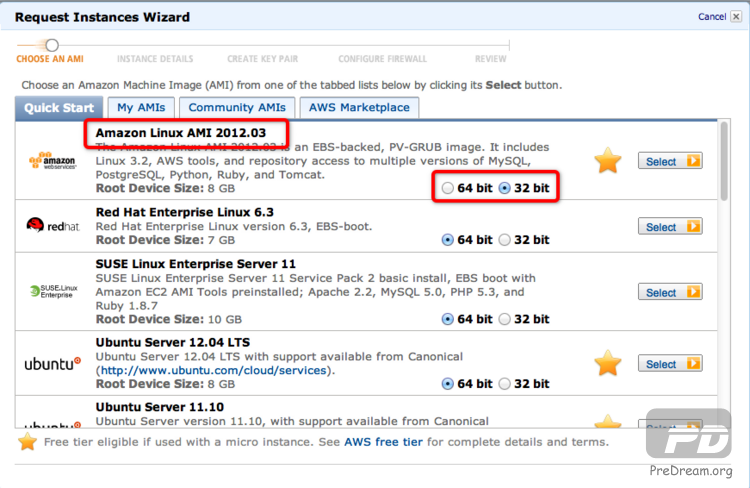
4.记得一定要选择Micro这个不然小心被扣费 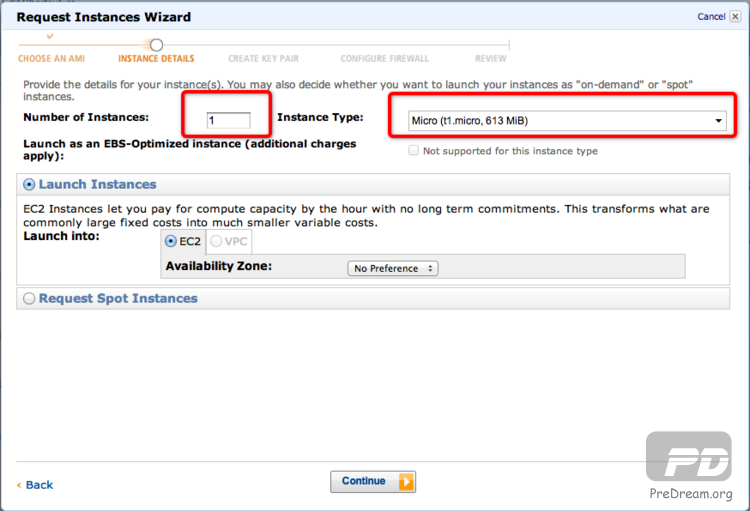
5.一路next下去,下载好生成的bleedfly.pem这个密钥 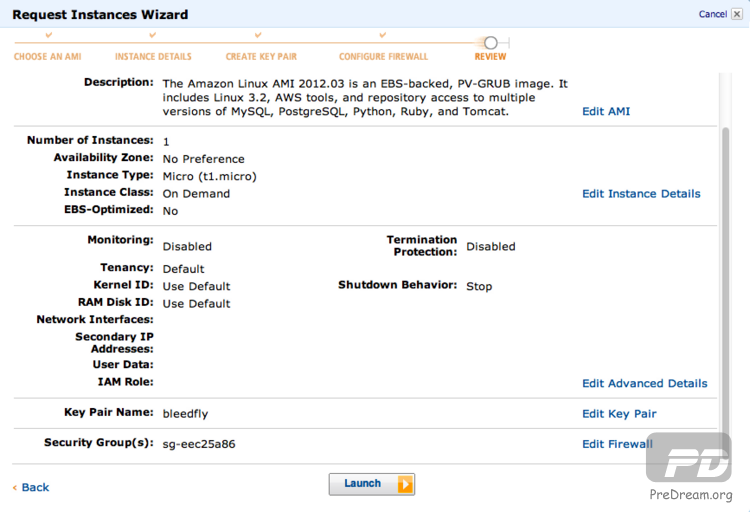
6.Launch之后等待instance初始化完成。找到public DNS
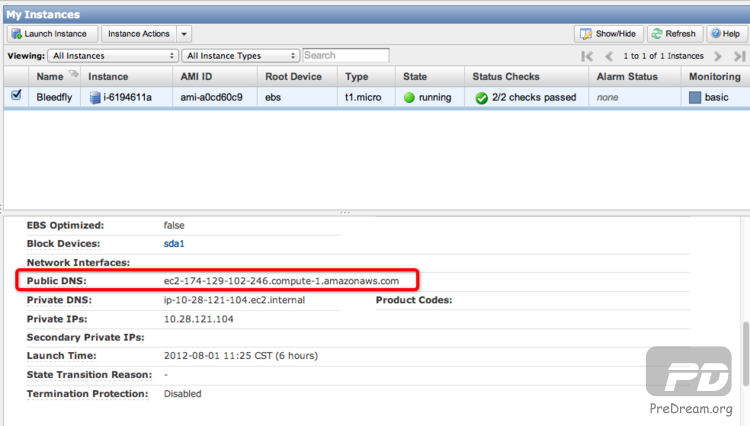
7.linux或者mac系统的话先 chmod 400 bleedfly.pem 直接 ssh -i bleedfly.pem ec2-user@ec2-174-129-102-246.compute-1.amazonaws.com 就能连接上
由于secureCRT不能直接连接pem,需要做如下转换才能用secureCRT连接上 chmod 600 bleedfly.pem
ssh-keygen -p -f bleedfly.pem
ssh-keygen -e -f bleedfly.pem > bleedfly.pem.pub
就创建了在SecureCRT中所使用的验证文件
在SecureCRT选连接->新建会话->协议选择ssh2 下一步 -> 主机名填写public dns 下一步,用户名填写ec2-user 下一步 -> 完成.
在连接的列表中找到刚创建的连接,右键属性,左边树中选择SSH2,然后选择右边鉴权中公钥,点属性,在出来的对话框中选择刚才生成的文件,这样就可以用SecureCRT登陆了
三.openvpn配置
1.安装
sudo yum -y install openvpn
2.移动easy-rsa到一个方便操作的位置
sudo cp -R /usr/share/openvpn/easy-rsa /etc/openvpn/
3.进入目录
cd /etc/openvpn/easy-rsa/2.0
4.运行以下命令
./clean-all
source ./vars #使设置生效
./build-ca server #创建证书颁发机构CA,一路回车
./build-key-server server #生成服务器证书,一路回车,最后两个y
./build-key bleedfly #生成名为bsk的客户证书,一路回车,最后两个y
./build-dh #生成Diffie Hellman参数
5.编辑openvpn配置文件
cd /etc/openvpn/
vim server.conf
写入
port 443
proto tcp
dev tun
ca /etc/openvpn/easy-rsa/2.0/keys/ca.crt
cert /etc/openvpn/easy-rsa/2.0/keys/server.crt
key /etc/openvpn/easy-rsa/2.0/keys/server.key
dh /etc/openvpn/easy-rsa/2.0/keys/dh1024.pem
server 192.168.0.0 255.255.255.0
push "redirect-gateway def1"
push "dhcp-option DNS 8.8.8.8"
push "dhcp-option DNS 8.8.4.4"
client-to-client
keepalive 10 120
comp-lzo
persist-key
persist-tun
verb 3
配置端口转发
vi /etc/sysctl.conf
将net.ipv4.ip_forward = 0改成net.ipv4.ip_forward = 1,将net.ipv4.tcp_syncookies = 1改为#net.ipv4.tcp_syncookies = 1保存,执行sysctl -p使之生效。 输入
iptables -t nat -A POSTROUTING -s 192.168.0.0/24 -j SNAT --to-source 1.2.3.4 #1.2.3.4为你的vps IP
/etc/init.d/iptables save #保存iptables设置
/etc/init.d/iptables restart #重启iptables
添加开机启动
sudo vim /etc/rc.local
添加一行
/usr/sbin/openvpn --config /etc/openvpn/server.conf
最后启动openvpn
sudo openvpn --config /etc/openvpn/server.conf
到此服务器端配置完毕
四.windows客户端配置
1.下载安装openvpn
2.在服务器端安装lrzsz
先安装gcc sudo yum install gcc
wget http://ohse.de/uwe/releases/lrzsz-0.12.20.tar.gz
tar zxvf lrzsz-0.12.20.tar.gz
cd lrzsz-0.12.20
./configure --prefix=/usr/local/lrzsz
make
make install
cd /usr/bin
ln -s /usr/local/lrzsz/bin/lrz rz
ln -s /usr/local/lrzsz/bin/lsz sz
这样就能在SecureCRT里面rz,sz
3.下载ca.crt bleedfly.key bleedfly.crt
这三个文件放在openvpn客户端安装路径下得config文件夹中
4.在config下新建一个名字为“bleedfly.ovpn”的文本文件
client
dev tun
proto tcp
remote 1.2.3.4 443 # 1.2.3.4 为EC2 的Public DNS, 不能用内部IP。
resolv-retry infinite
nobind
persist-key
persist-tun
ca ca.crt
cert bleedfly.crt
key bleedfly.key
ns-cert-type server
comp-lzo
verb 3
5.运行 OpenVPN GUI,然后connect。
五.mac下客户端配置
下载tunnelblick这个软件,同windwos一样将3个文件放到配置下,新增bleedfly.ovpn 文件,代码同windows