JavaScript Fetch API Tutorial with JS Fetch Post and Header Examples
If you are writing a web application, chances are you will have to work with external data. This can be your own database, third party APIs, and so on.
When AJAX first appeared in 1999, it showed us a better way to build web applications. AJAX was a milestone in web development and is the core concept behind many modern technologies like React.
Before AJAX, you had to re-render an entire web page even for minor updates. But AJAX gave us a way to fetch content from the backend and update selected user interface elements. This helped developers improve user experience and build larger, complicated web platforms.
Crash Course on REST APIs
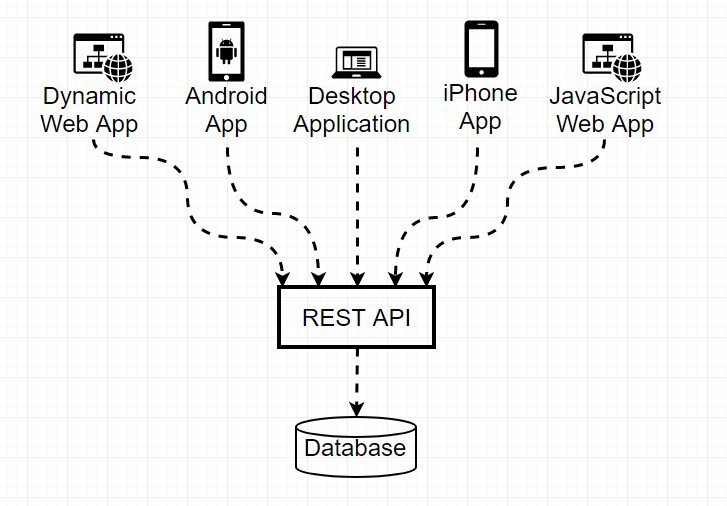
We are now in the age of RESTful APIs. Simply put, a REST API lets you push and pull data from a datastore. This might either be your database or a third party’s server like the Twitter API.
There are a few different types of REST APIs. Let’s look at the ones you will use in most cases.
- GET — Get data from the API. For example, get a twitter user based on their username.
- POST — Push data to the API. For example, create a new user record with name, age, and email address.
- PUT — Update an existing record with new data. For example, update a user’s email address.
- DELETE — Remove a record. For example, delete a user from the database.
There are three elements in every REST API. The request, response, and headers.
Request — This is the data you send to the API, like an order id to fetch the order details.
 Sample Request
Response — Any data you get back from the server after a successful / failed request.
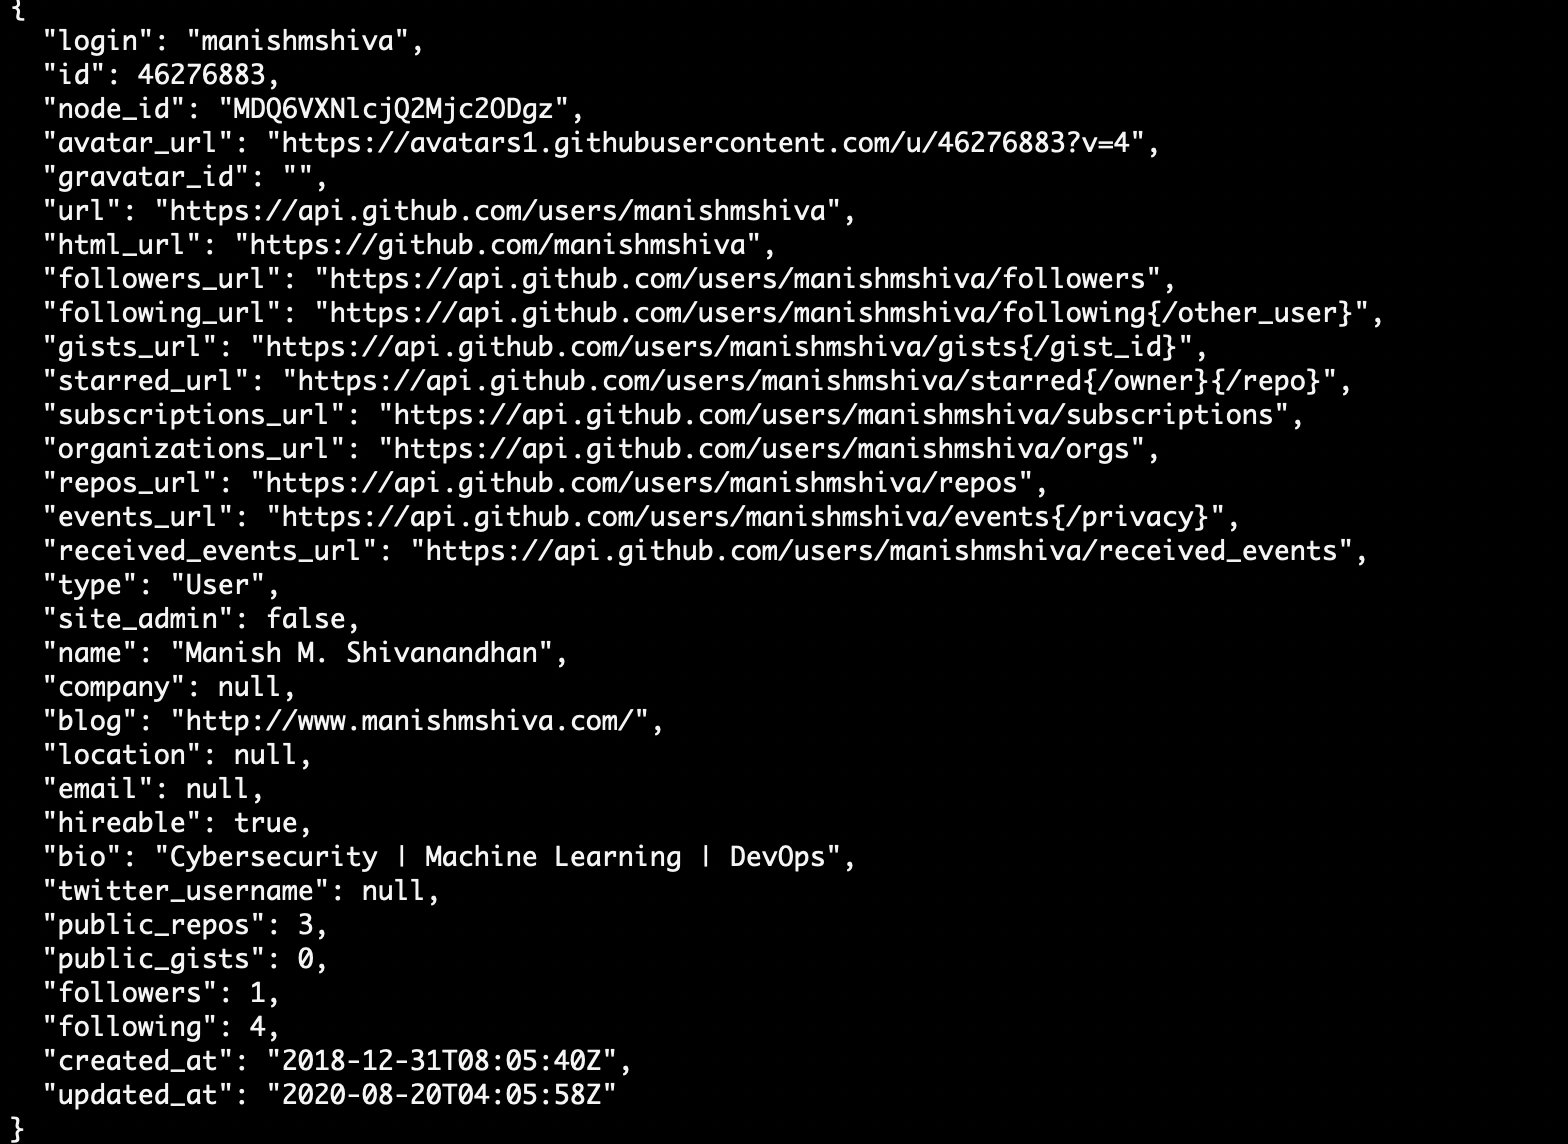 Sample Response
Headers — Additional metadata passed to the API to help the server understand what type of request it is dealing with, for example “content-type”.
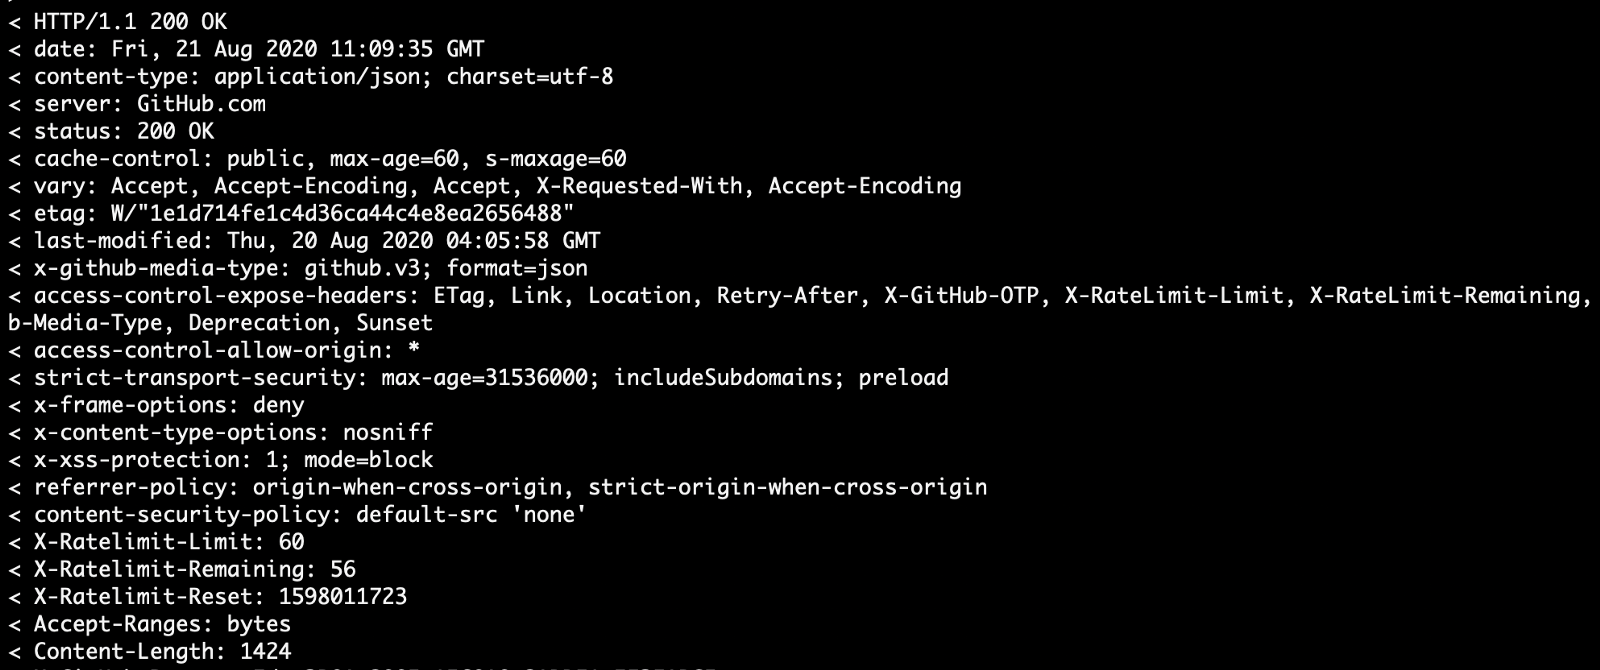 Sample Headers
The real advantage of using a REST API is that you can build a single API layer for multiple applications to work with.
If you have a database that you want to manage using a web, mobile, and desktop application, all you need is a single REST API Layer.
Now that you know how REST APIs work, let's look at how we can consume them.
XMLHttpRequest
Before JSON took over the world, the primary format of data exchange was XML. XMLHttpRequest() is a JavaScript function that made it possible to fetch data from APIs that returned XML data.
XMLHttpRequest gave us the option to fetch XML data from the backend without reloading the entire page.
This function has grown from its initial days of being XML only. Now it supports other data formats like JSON and plaintext.
Let's write a simple XMLHttpRequest call to the GitHub API to fetch my profile.
// function to handle successfunction success() {
    var data = JSON.parse(this.responseText); //parse the string to JSON
    console.log(data);}// function to handle errorfunction error(err) {
    console.log('Request Failed', err); //error details will be in the "err" object}var xhr = new XMLHttpRequest(); //invoke a new instance of the XMLHttpRequestxhr.onload = success; // call success function if request is successfulxhr.onerror = error;  // call error function if request failedxhr.open('GET', 'https://api.github.com/users/manishmshiva'); // open a GET requestxhr.send(); // send the request to the server.
The above code will send a GET request to https://api.github.com/users/manishmshiva to fetch my GitHub info in JSON. If the response was successful, it will print the following JSON to the console:
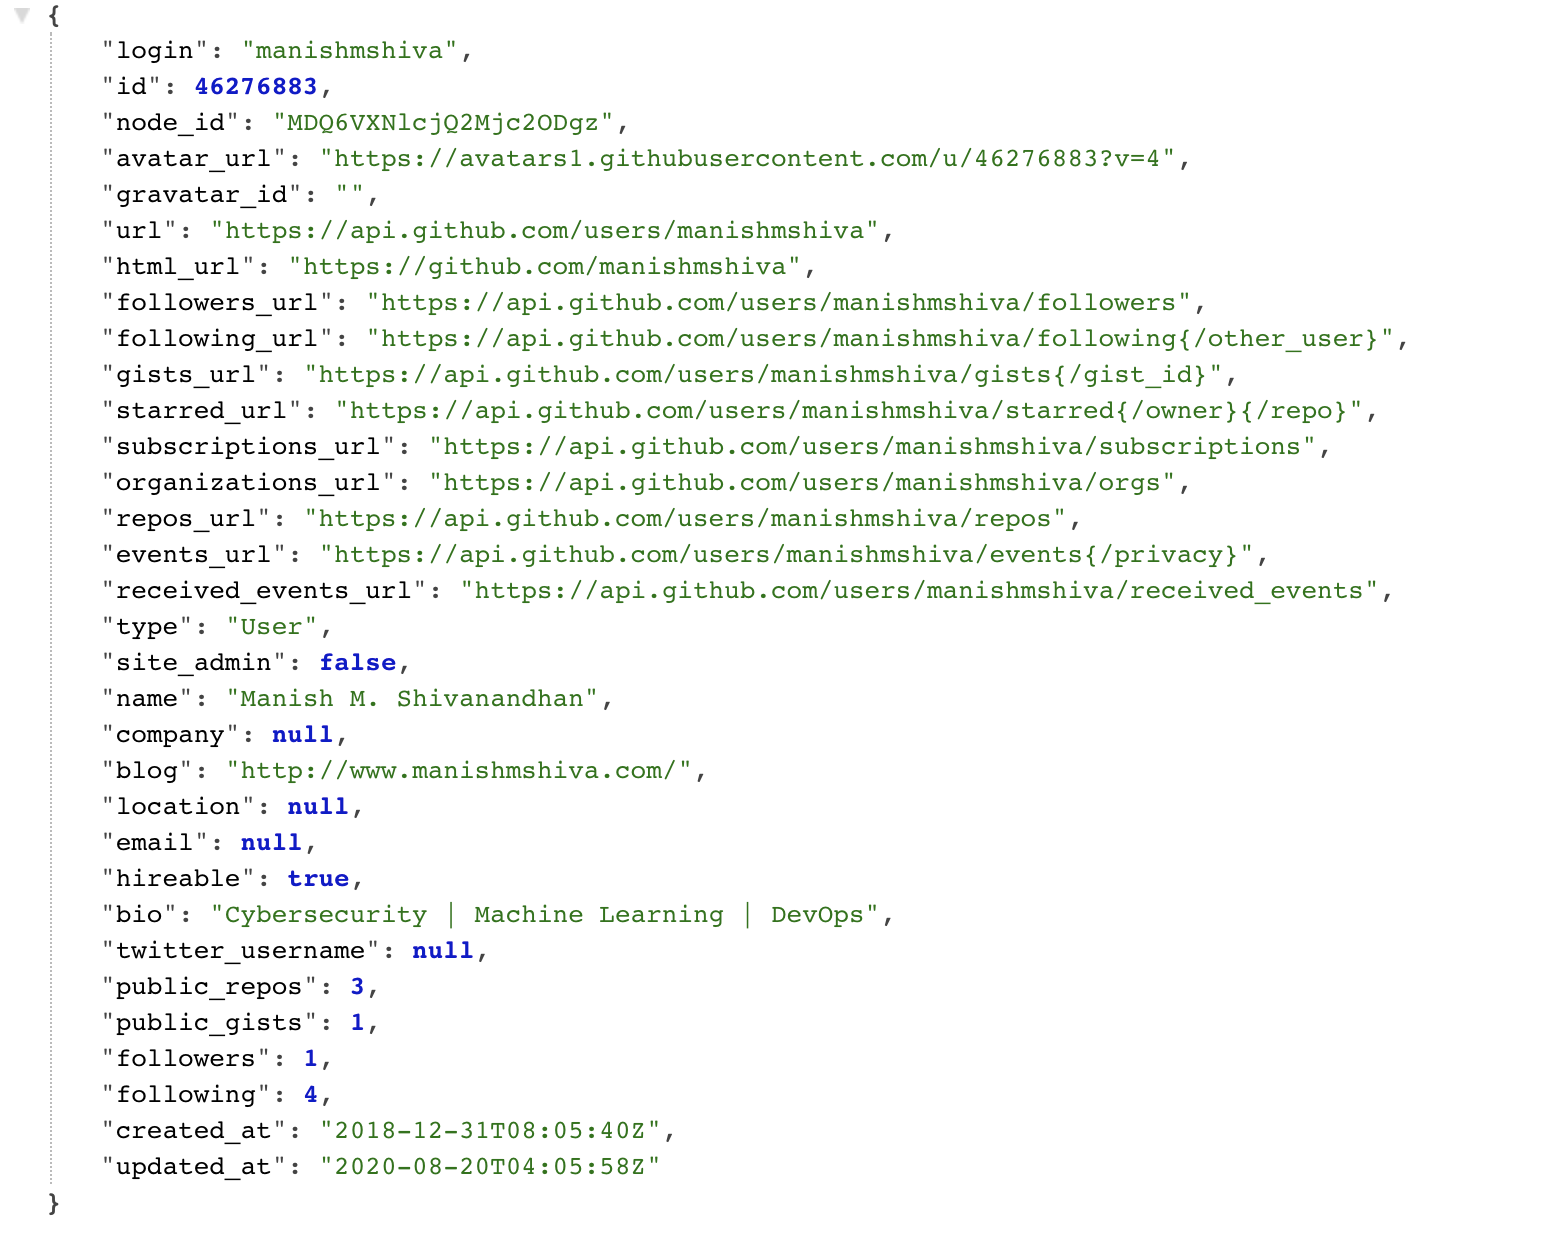
If the request failed, it will print this error message to the console:

Fetch API
The Fetch API is a simpler, easy-to-use version of XMLHttpRequest to consume resources asynchronously. Fetch lets you work with REST APIs with additional options like caching data, reading streaming responses, and more.
The major difference is that Fetch works with promises, not callbacks. JavaScript developers have been moving away from callbacks after the introduction of promises.
For a complex application, you might easily get into a habit of writing callbacks leading to callback hell.
With promises, it is easy to write and handle asynchronous requests. If you are new to promises, you can learn how they work here.
Here is how the function we wrote earlier would look like if you used fetch() instead of XMLHttpRequest:
// GET Request.fetch('https://api.github.com/users/manishmshiva')
    // Handle success
    .then(response => response.json())  // convert to json
    .then(json => console.log(json))    //print data to console
    .catch(err => console.log('Request Failed', err)); // Catch errors
The first parameter of the Fetch function should always be the URL. Fetch then takes a second JSON object with options like method, headers, request body, and so on.
There is an important difference between the response object in XMLHttpRequest and Fetch.
XMLHttpRequest returns the data as a response while the response object from Fetch contains information about the response object itself. This includes headers, status code, etc. We call the “res.json()” function to get the data we need from the response object.
Another important difference is that the Fetch API will not throw an error if the request returns a 400 or 500 status code. It will still be marked as a successful response and passed to the ‘then’ function.
Fetch only throws an error if the request itself is interrupted. To handle 400 and 500 responses, you can write custom logic using ‘response.status’. The ‘status’ property will give you the status code of the returned response.
Great. Now that you understand how the Fetch API works, let's look at a couple more examples like passing data and working with headers.
Working with Headers
You can pass headers using the “headers” property. You can also use the headers constructor to better structure your code. But passing a JSON object to the “headers” property should work for most cases.
fetch('https://api.github.com/users/manishmshiva', {
  method: "GET",
  headers: {"Content-type": "application/json;charset=UTF-8"}}).then(response => response.json()) .then(json => console.log(json)); .catch(err => console.log(err));
Passing Data to a POST Request
For a POST request, you can use the “body” property to pass a JSON string as input. Do note that the request body should be a JSON string while the headers should be a JSON object.
// data to be sent to the POST requestlet _data = {
  title: "foo",
  body: "bar",
  userId:1}fetch('https://jsonplaceholder.typicode.com/posts', {
  method: "POST",
  body: JSON.stringify(_data),
  headers: {"Content-type": "application/json; charset=UTF-8"}}).then(response => response.json()) .then(json => console.log(json));.catch(err => console.log(err));
The Fetch API is still in active development. We can expect better features in the near future.
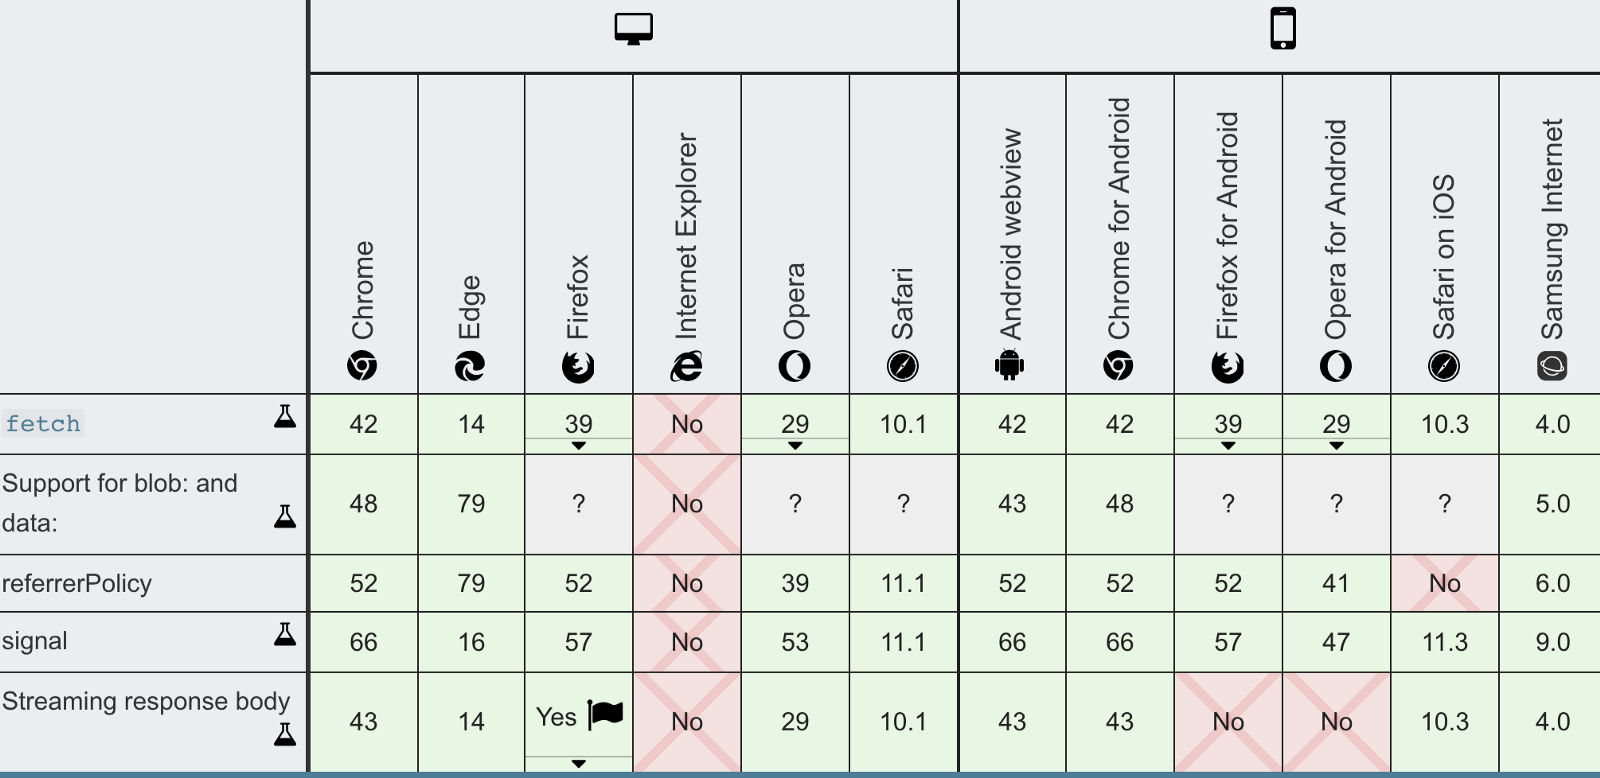
However, most browsers support the use of Fetch in your applications. The chart below should help you figure out which browsers support it on the web and mobile apps.
I hope this article helped you understand how to work with the Fetch API. Be sure to try out Fetch for your next web application.
https://fetch.spec.whatwg.org/#fetch-method
A new connection setting is "no", "yes", or "yes-and-dedicated".
To obtain a connection, given a network partition key key, URL url, boolean credentials, an optional new connection setting new (default "no"), and an optional boolean http3Only (default false), run these steps:
If new is "no", then:
Let connections be a set of connections in the user agent’s connection pool whose key is key, origin is url’s origin, and credentials is credentials.
If connections is not empty and http3Only is false, then return one of connections.
If there is an HTTP/3 connection in connections, then return that connection.
Let proxies be the result of finding proxies for url in an implementation-defined manner. If there are no proxies, let proxies be « "DIRECT" ».
This is where non-standard technology such as Web Proxy Auto-Discovery Protocol (WPAD) and proxy auto-config (PAC) come into play. The "DIRECT" value means to not use a proxy for this particular url.
Let timingInfo be a new connection timing info.
For each proxy of proxies:
Set timingInfo’s domain lookup start time to the unsafe shared current time.
Let hosts be « origin’s host ».
If proxy is "DIRECT", then set hosts to the result of running resolve an origin given key and url’s origin.
If hosts is failure, then continue.
Set timingInfo’s domain lookup end time to the unsafe shared current time.
Let connection be the result of running this step: run create a connection given key, url’s origin, credentials, proxy, an implementation-defined host from hosts, timingInfo, and http3Only an implementation-defined number of times, in parallel from each other, and wait for at least 1 to return a value. In an implementation-defined manner, select a value to return from the returned values and return it. Any other returned values that are connections may be closed.
Essentially this allows an implementation to pick one or more IP addresses from the return value of resolve an origin (assuming proxy is "DIRECT") and race them against each other, favor IPv6 addresses, retry in case of a timeout, etc.
If connection is failure, then continue.
If new is not "yes-and-dedicated", then append connection to the user agent’s connection pool.
Return connection.
Return failure.
[JS] JavaScript Fetch API Tutorial with JS Fetch Post and Header Examples
[JS] ESlint错误,类型'() => Promise
[API] 微信API开发报错
[JS] Component provided template option but runtime compilation is not supported in this build of Vue. Configure your bundler to alias "vue"
[API] 盈透常用问答(1) TWS交易平台使用
[JS] [Vue warn]: There is already an app instance mounted on the host container.
[API] 同花顺日线历史数据文件格式
autojs图片回收时img, bitmap和mat三者的关系
JQuery方法查询大全【重要】
jQuery中对动态添加的元素绑定事件
Does xmlhttprequest keep connection open after request has been processed?
fetch API中的request.mode有什么意义
JavaScript Fetch API Tutorial with JS Fetch Post and Header Examples
jquery中Json操作
用 js 的 selection range 操作选择区域内容和图片
Chrome插件消息传递实例